Raspberry Pi’s default desktop environment, Pixel, is both fast and stable.. However, when it comes to appearance, customization options are limited. Users can only modify the background, switch between light and dark themes, and adjust fonts, providing minimal control over the desktop’s look and feel. To enhance customization, we will install a custom desktop environment on Raspbian.
One advantage of using a custom desktop instead of switching to an entirely different distribution is that we remain within the Raspbian ecosystem. This ensures better compatibility with existing applications, though some exceptions exist—for instance, Pi Clone requires the Pixel desktop to function properly.
Lets get started!
Required Materials:
- A Windows, Mac, or Linux computer with an SD card reader and Raspberry Pi Imager installed
- Micro SD card
- Raspberry Pi
Insert the micro SD card into your computer. There’s no need to format it manually, as the Raspberry Pi Imager will take care of that for you.
Preparing the SD card
1. Open Raspberry Pi Imager: Open the software and select the version of Raspberry Pi hardware you’re using in the “Pi Device” section.
2. Select Raspbian OS: In the “OS” section, scroll down to “Raspberry Pi OS (Other)” and choose the appropriate Raspbian 32/64-bit lite Install option, depending on the version supported by your target Raspberry Pi. We are installing the lightweight (headless, desktop-free) version to prevent conflicts that may arise from installing our custom desktop on top of the existing Pixel environment.
3. Select the SD Card: In the “Storage” section, select the SD card you inserted earlier and click Next.
4. Customize the Installation: You will be prompted to customize the installation. It’s recommended to select Yes for Raspbian, as this will save you some setup time later. For other distributions, select No to avoid potential configuration conflicts. Once you’ve made your selection, click Save.
5. Flash the card: After you have chosen your configuration method click next and follow through the prompts to flash the card.
Remember, when you insert the SD card and boot your Raspberry Pi for the first time, allow it time to run its setup script and resize the user partition. During this process, the system may display a command line prompt, which can be misleading and make it seem like the setup is complete. However, the process typically takes around three minutes to finish.
Once your logged in remember to run the following commands to update your pi before we proceed.
$ sudo apt update
$ sudo apt upgrade
Once the updates have finished, in this case, we are going to issue a reboot command. It’s usually a good idea, anytime you’re applying a lot of updates to many packages, to reboot before proceeding to avoid conflicts. Enter the command:
$ sudo reboot
Once everything has rebooted and you’re logged back in, you’re ready to proceed.
Installing the custom desktop using Tasksel
Tasksel is a command line tool that simplifies the installation process for the software it supports. Its designed to install multiple software packages as a single “task” which enables the user to get the software up and running without having to manually install multiple packages and dependencies.
Specifically we need it to install the desktop environment, and lightdm, a desktop manager found in many distributions of Linux. It handles this on its own in most cases, but with some environments such as KDE, you will need to manually install lightdm and select it as the active manager once tasksel has installed the desktop. In KDE’s case because it uses sddm by default, and in gnomes case because it doesn’t even install a manager at all. I recommend sticking with lightdm only for now and avoiding sddm. I ran into a few different problems when I attempted to use sddm on a pi.
To run Tasksel, open a terminal and enter the following command:
$ sudo tasksel

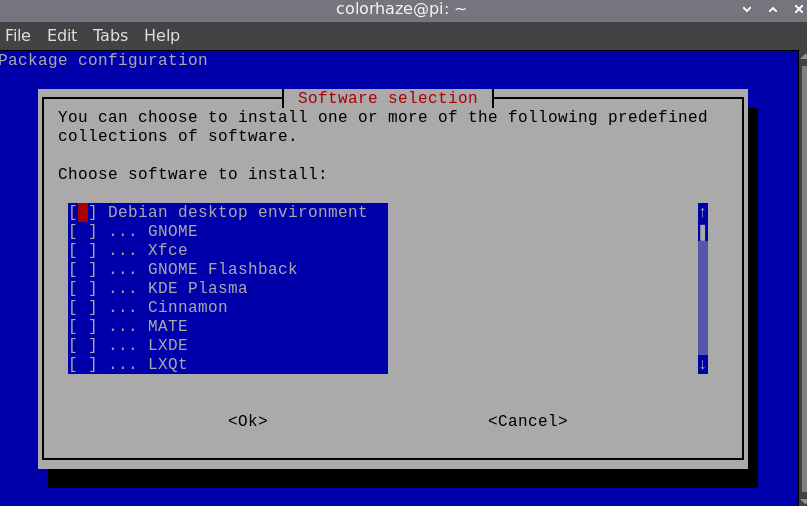
You will see a screen with multiple desktop environment options. I may write a detailed article later comparing the different desktops available on Raspbian, but for now, I recommend choosing Cinnamon for the best balance or KDE if you prefer a more visually appealing interface at the cost of some performance.
Use the arrow keys to navigate, the space bar to select the desktop environment you want to install, then press Tab to highlight <OK> and Enter to proceed.
Tasksel will run the install and display a progress bar indicating approximate time left (like nearly all progress bars, it is wildly inaccurate most of the time). Once it finishes it will dump you back at the command line prompt. Don’t reboot just yet though. We have one more thing we need to configure first and a possible package we will need to install depending on the desktop chosen.
Configuring raspi-config to boot into the custom desktop environment.
Before we reboot we need to tell the Pi to use the custom desktop we just installed. Open a terminal window and enter the following command:
$ sudo raspi-config

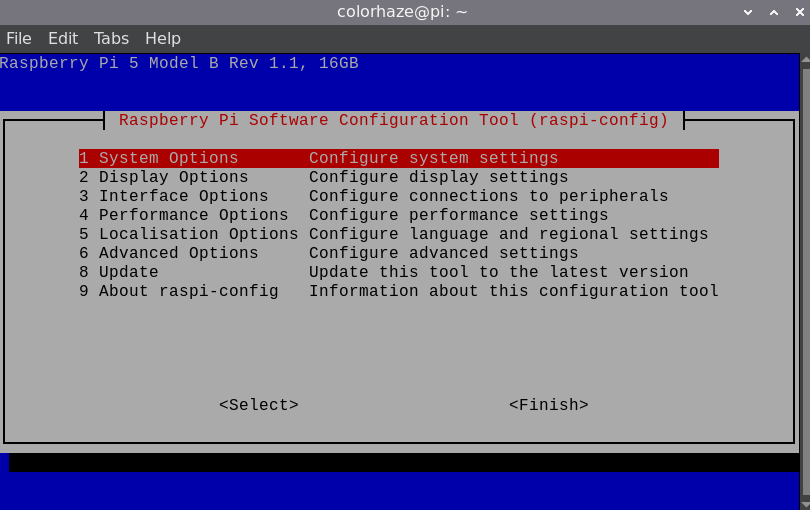
You will be presented with this screen. Select 1 System Options and then press Enter.

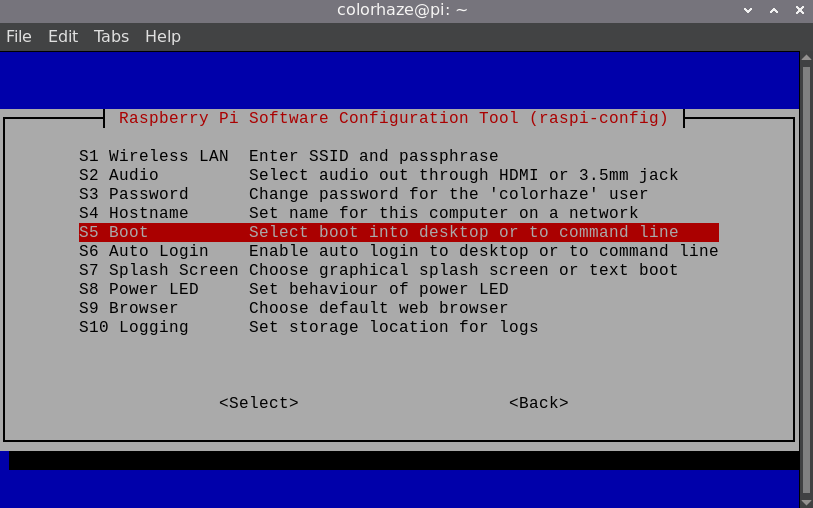
Select S5 Boot and then press Enter. On the Following screen choose Desktop GUI opting if you would like to require user login on boot (recommended for security) or not, then press Enter.
As mentioned earlier, you may need to install LightDM, depending on the desktop environment you selected. If tasksel did not install it automatically, you will receive a message prompting you to install LightDM. This is especially necessary for KDE, as it requires LightDM for compatibility on a Pi.
If you do not see this message and did not install KDE, your setup is complete. However, if you installed KDE or received the message, exit raspi-config and run the following command:
$ sudo apt-get install lightdm
Once the install finishes it will present you with a selection of managers. Make sure you select lightdm and press Enter
You then need to enter back into raspi-config via the terminal and set the desktop environment again following the directions above.
That’s it! You can back out of raspi-config now and issue the reboot command:
$ sudo reboot
When the system restarts, if all went well, it should boot into your chosen custom desktop. In most cases, you can log in using the username and password you set earlier in Raspberry Pi Imager. However, some desktop environments may require you to create a new user and password during the initial setup.
In Conclusion
That’s it for setting up a custom desktop environment on Raspbian. You should try them all out and see which one you like best! I will eventually get around to doing some write-ups on each, but till then let me know which you prefer in the comments below!
-Colorhaze
